Rancher server & Rancher agent in high availability on local environment with Vagrant & Virtualbox

The Touch4IT Team is responsible for developing, hosting, and maintaining tens of mobile and web applications. We want to assure our clients that if anything happens, their app will continue to operate smoothly. Hosting such several projects is not an easy task. Web applications and app backends are built using different technologies, require different libraries, and need various versions of those libraries to run correctly.
That is precisely why all of these apps and backends run in Docker. However, when you run numerous apps in Docker, you need to be able to deploy new versions and new apps without downtime. We also need to have multiple environments for development, staging, and production. That is where Docker orchestrators come in handy. There are many orchestrators available, but we will not be making any comparisons here. There are many great articles that cover an overview of Docker orchestration.
We decided to use Rancher 1.6, which uses Docker orchestrator Cattle, for the following reasons:
- simple, yet very functional UI
- working documentation
- production-grade stability
- ease of learning & use
- support with rancher-compose
- ability to deploy containers using CI tools (Gitlab CI)
- failover and rollback to the previous version in case of error
- works on bare metal
- capable of scaling to multiple virtual/physical hosts
- works in high availability
In this article, we provide a fully working Rancher playground running in a high-availability configuration. Let’s have a look at the image below to see how the playground is set up.
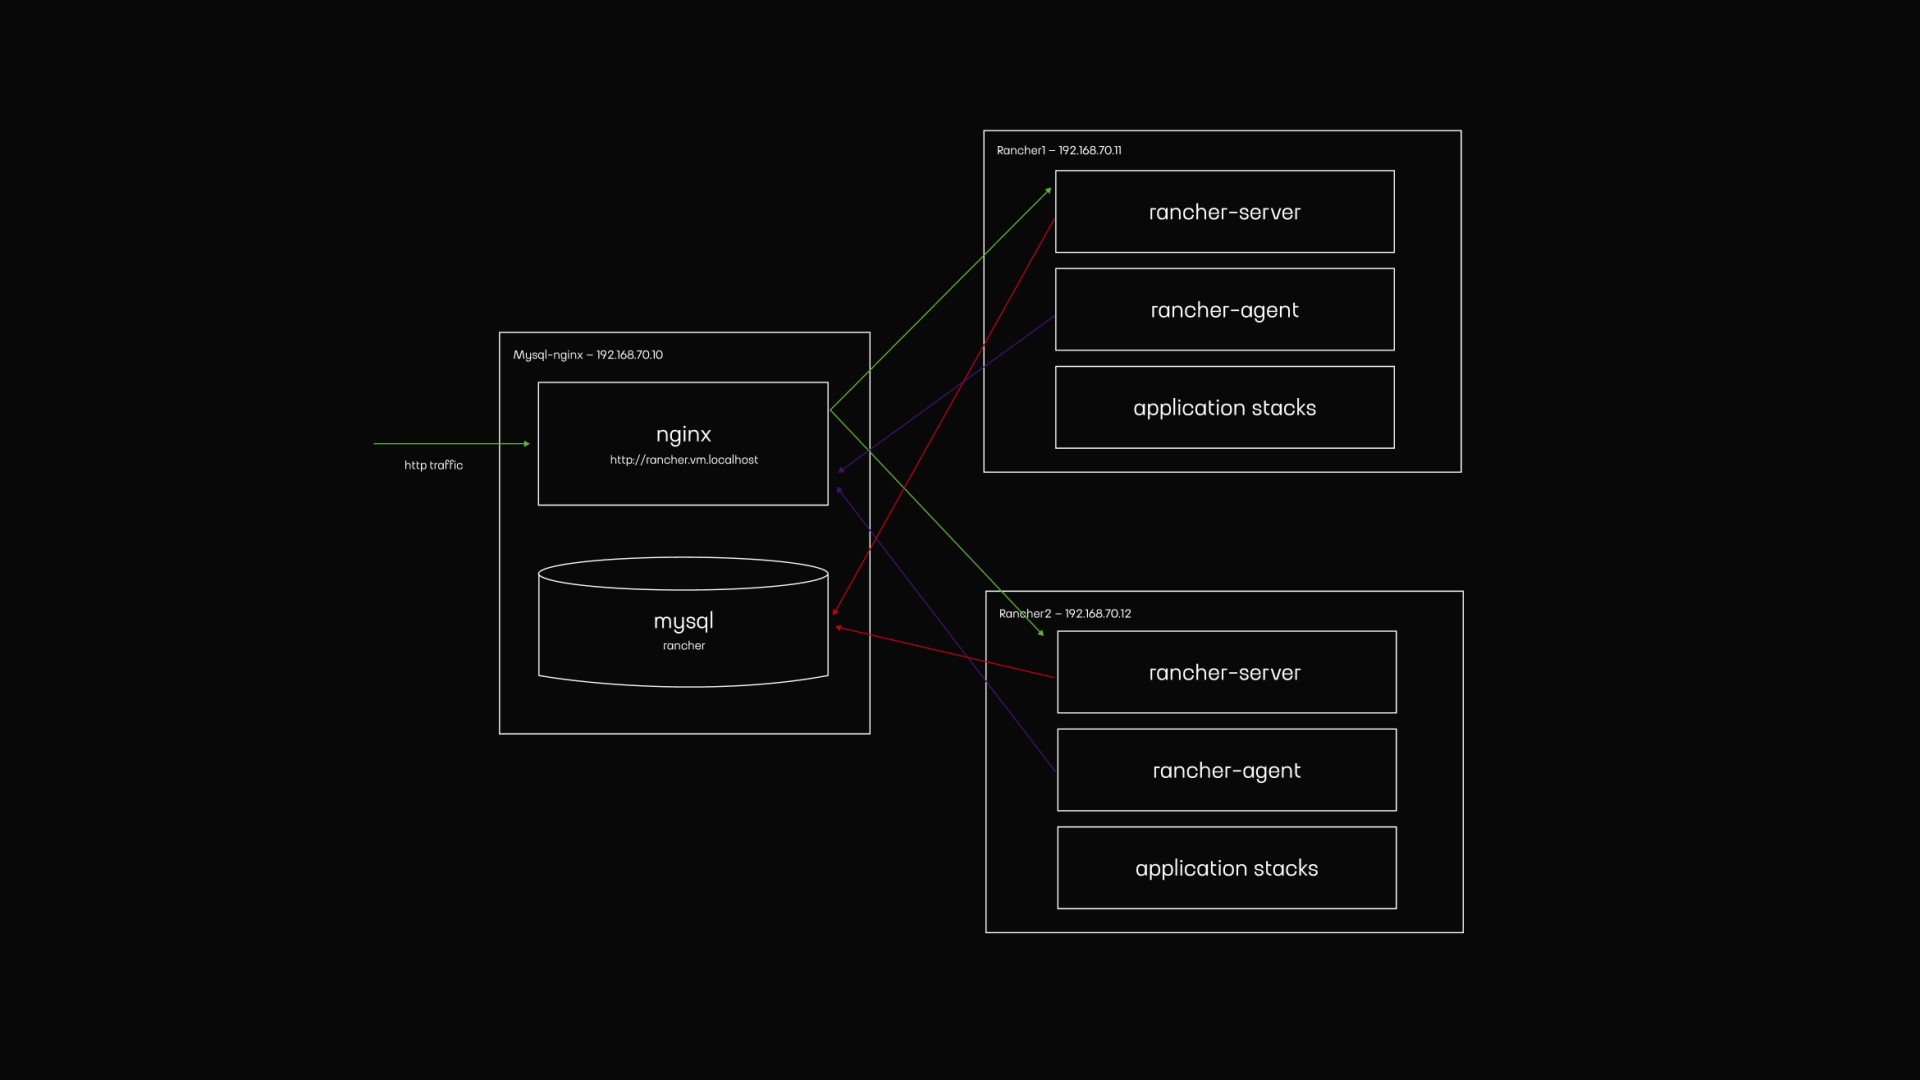
We have two virtual machines where rancher-server, rancher-agent, and application stacks are running. The Rancher server is a Docker container that runs the Rancher UI, API, Cattle orchestrator, and performs all administrative tasks. The Rancher agent is a Docker container that registers the host on which it runs with the Rancher server environment, whether virtual or physical.
For the purposes of this playground, we will run two server instances in high availability by placing each on a separate virtual machine. We will also have two agents, each assigned to two hosts, so apps will be deployed twice in case one host goes down. In the real world, you would need to put a load balancer in front of these virtual machines to direct HTTP traffic on ports 80 and 443 to both hosts, configure health checks, and stop sending traffic to the host if it is down.
On the MySQL-nginx virtual machine, Nginx serves as a load balancer for the Rancher server and its UI (green arrows). There is also a MySQL database where the Rancher server stores Rancher configuration and application stacks (red arrows). Then again, in the real world, you should set up a MySQL Cluster or another form of MySQL replication and use multiple load balancers to achieve high availability. The Rancher agent communicates with the Rancher server through our Nginx proxy (purple arrows).
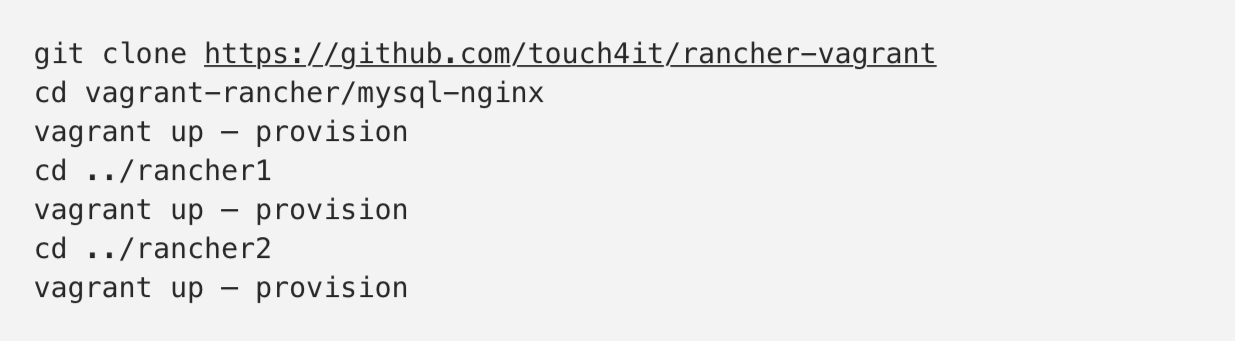
To run the playground on your local machine, you need to install Git, Vagrant, Virtualbox, and Rancher compose. We don’t want you to spend time setting up virtual machines; they're provisioned for you with Ansible. Check our GitHub repository for more information about how that is done.
Let’s clone our GitHub repository to get the playground source code:

Add testing domain name to your /etc/hosts file:

Start all 3 virtual machines. This step will take up to 10 minutes.
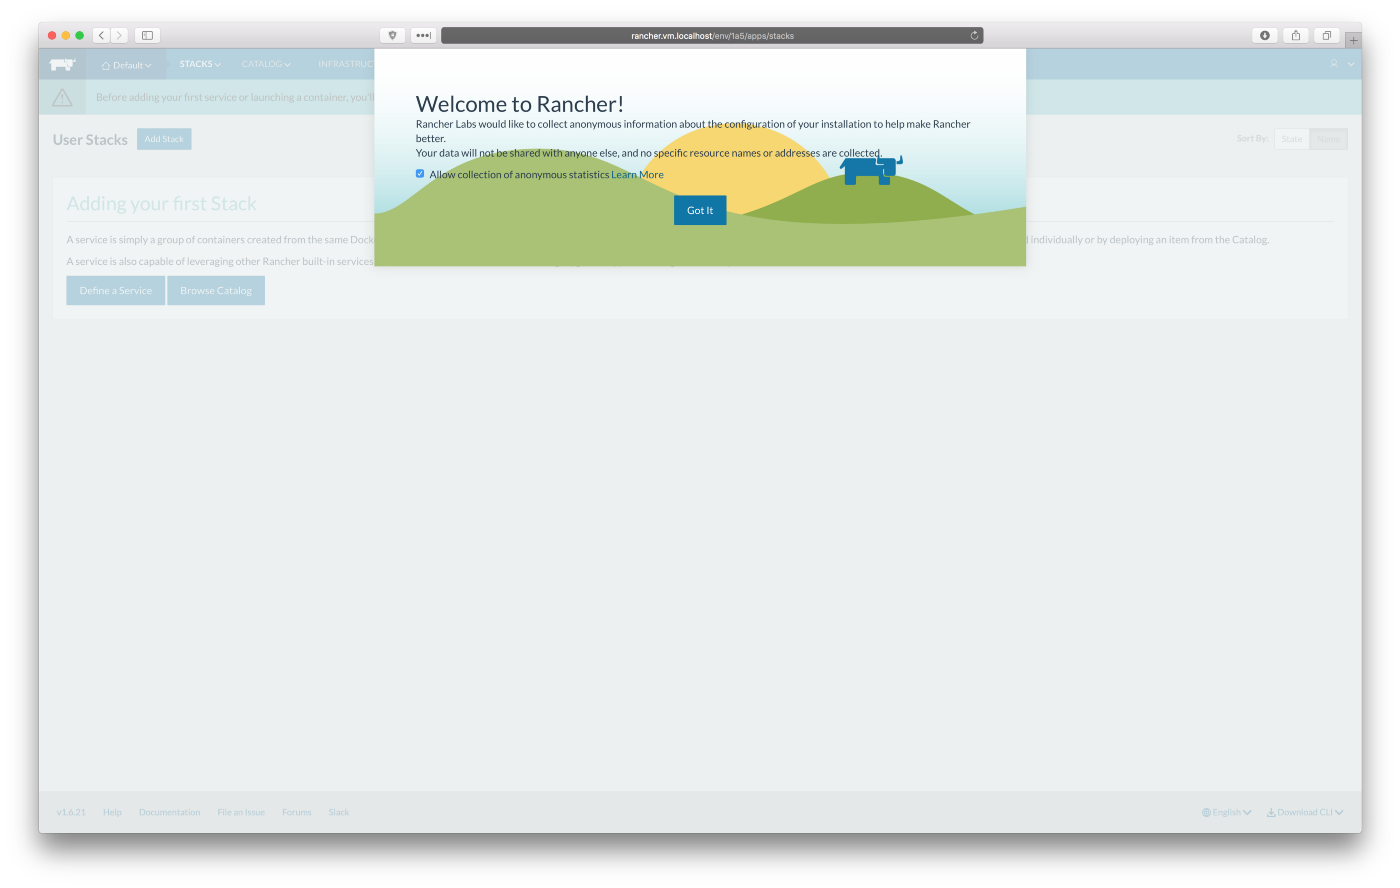
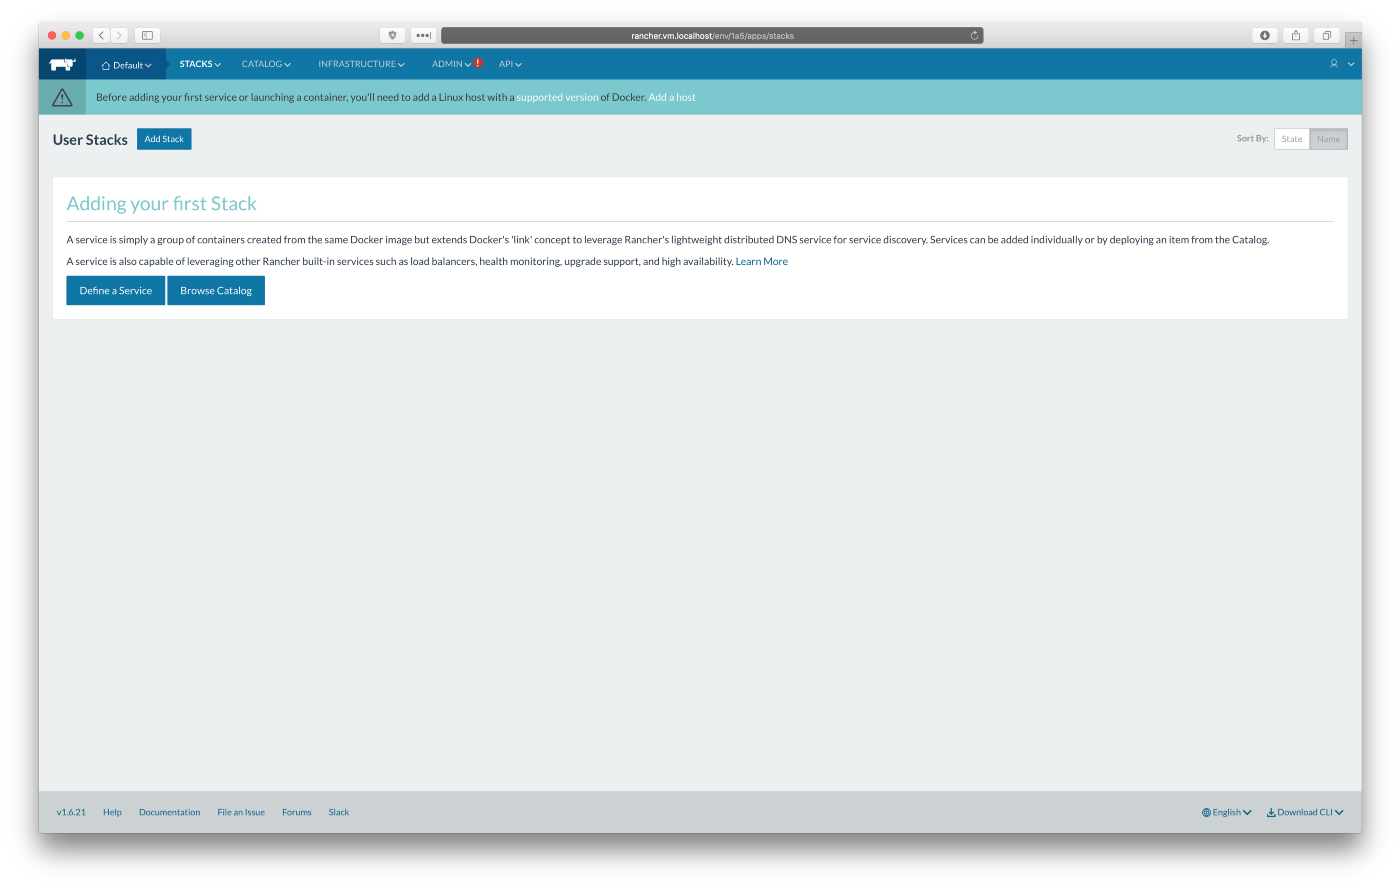
After all scripts have finished, Rancher server instances need a couple of minutes to initialize the MySQL database and determine which instance will become the master. When this is done, you will be able to visit Rancher UI in your browser on http://rancher.vm.localhost, see screenshots below:
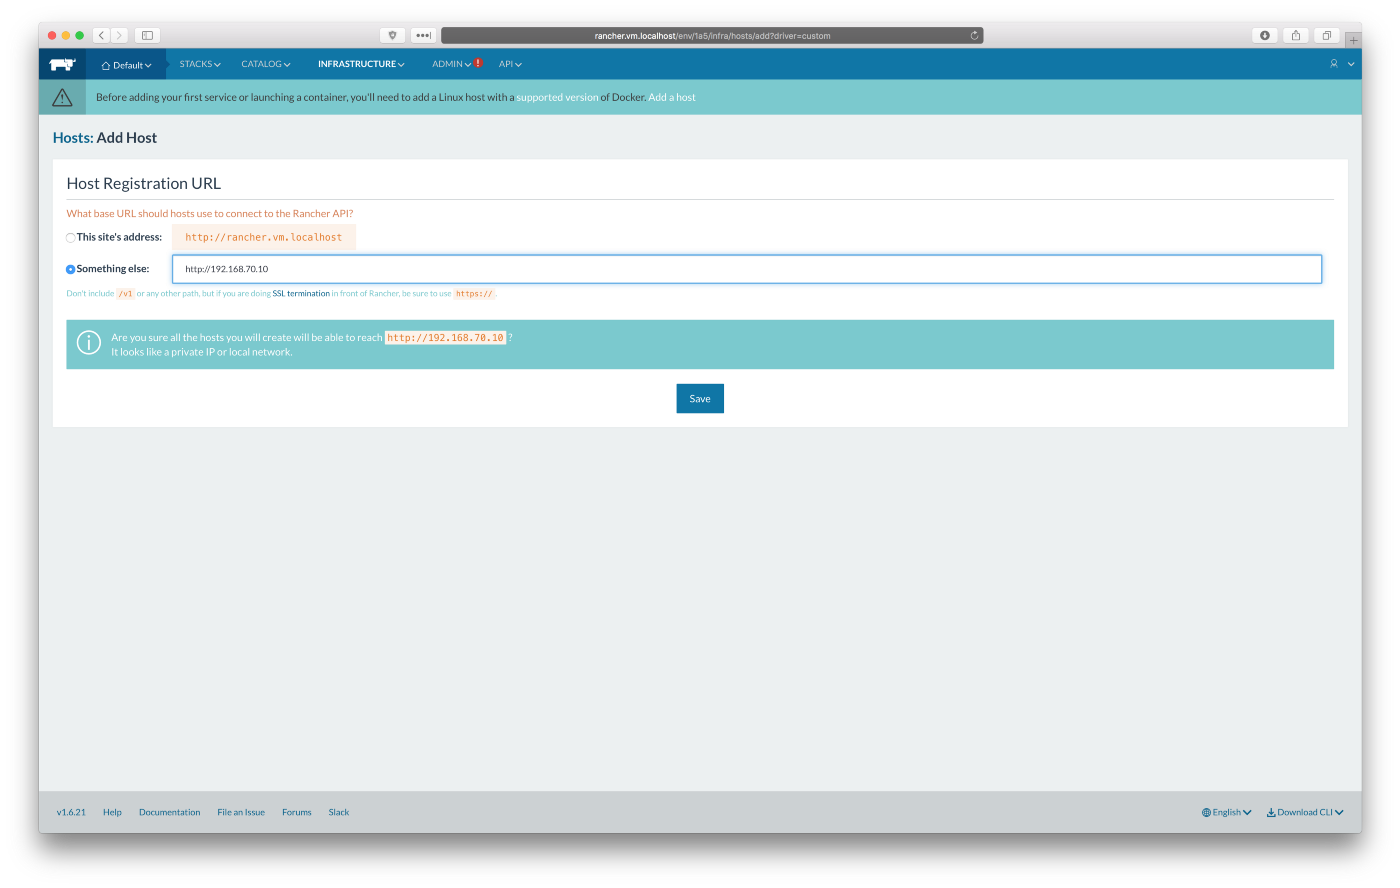
We need to create and start Rancher agents to make both of our virtual machines connect to the Rancher server “Default” environment. Click on “Add a host” button, set “Host Registration URL” to http://192.168.70.10 — that is the IP address of our virtual machine running Nginx proxy. Click “Save”.
Copy “docker run …” command from point 5, screenshot below:
Note: the hash at the end of the Rancher agent “docker run” command is different for each Rancher server installation, which’s why it is not done automatically for you.
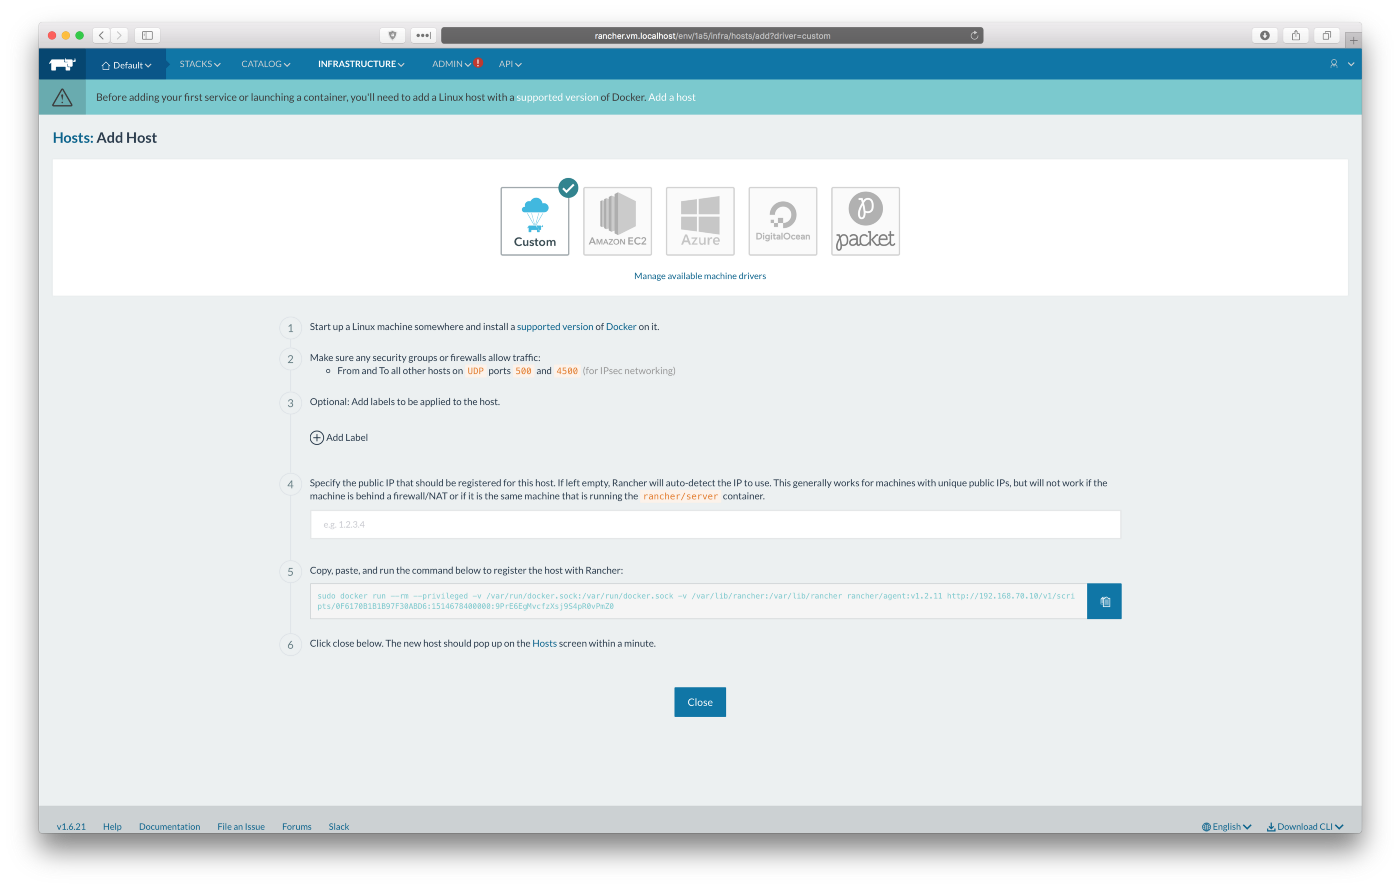
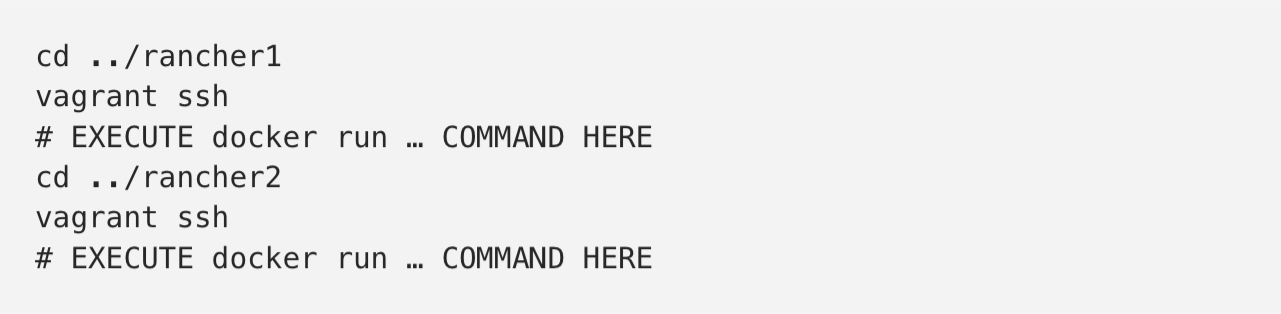
Run the command you copied in the previous step, “docker run …” on both of our Rancher virtual machines: rancher1 and rancher2
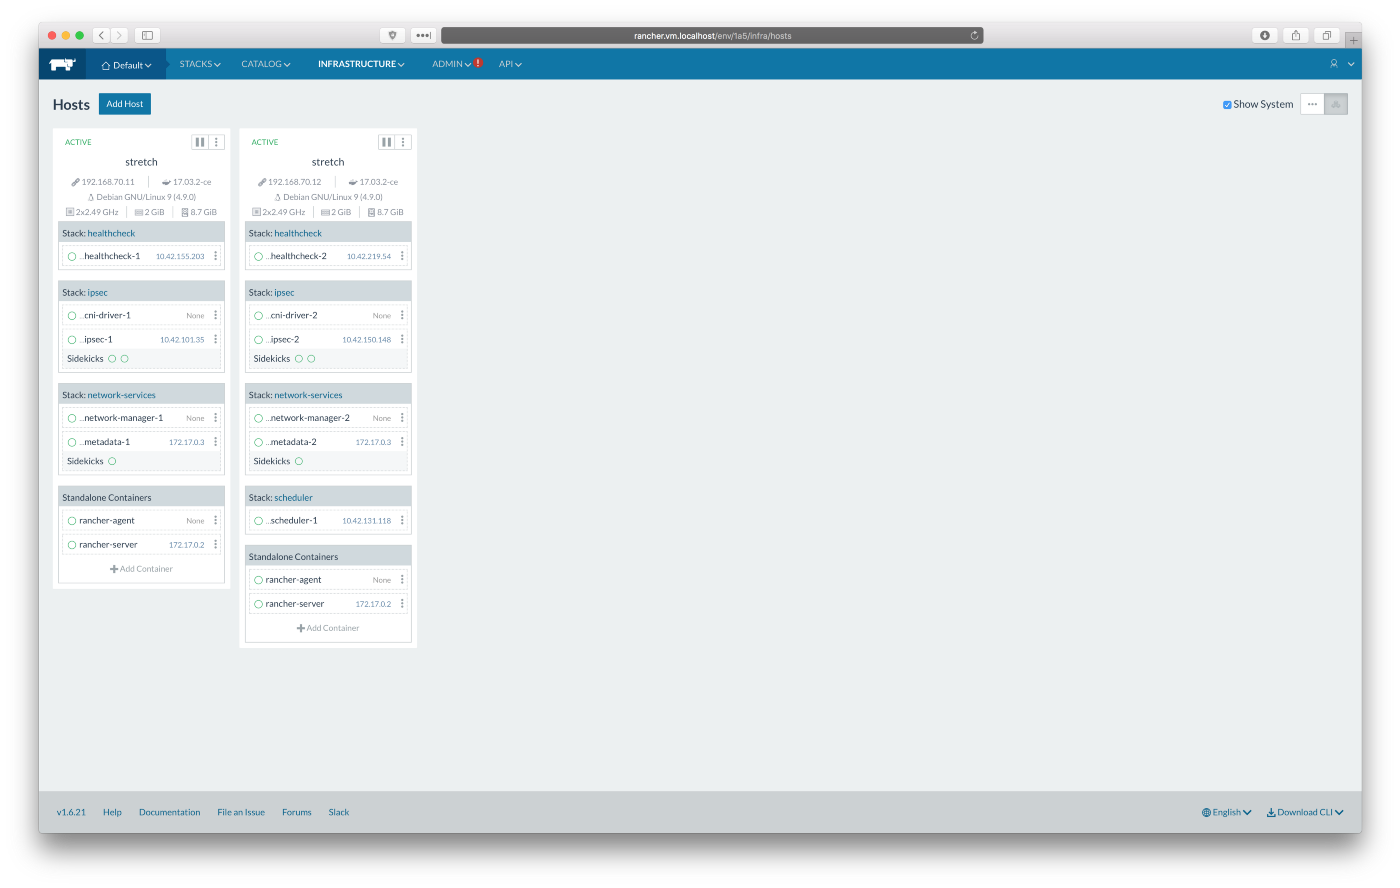
Go to http://rancher.vm.localhost/env/1a5/infra/hosts. It will take up to 10 minutes for both hosts to become available and for all stacks to be green. It should look as on the screenshot below:
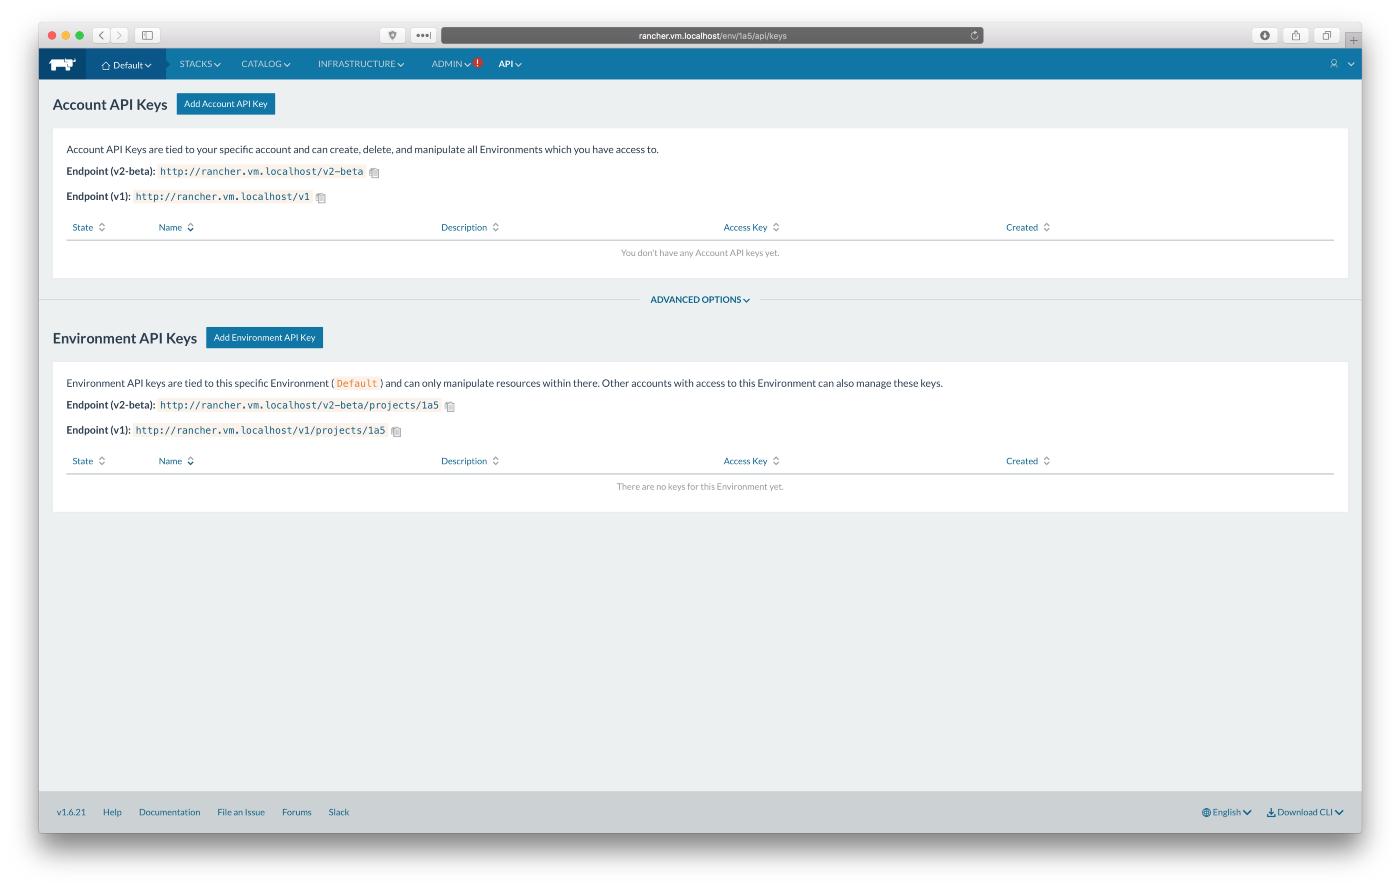
We need to create an environment API key and configure Rancher compose.
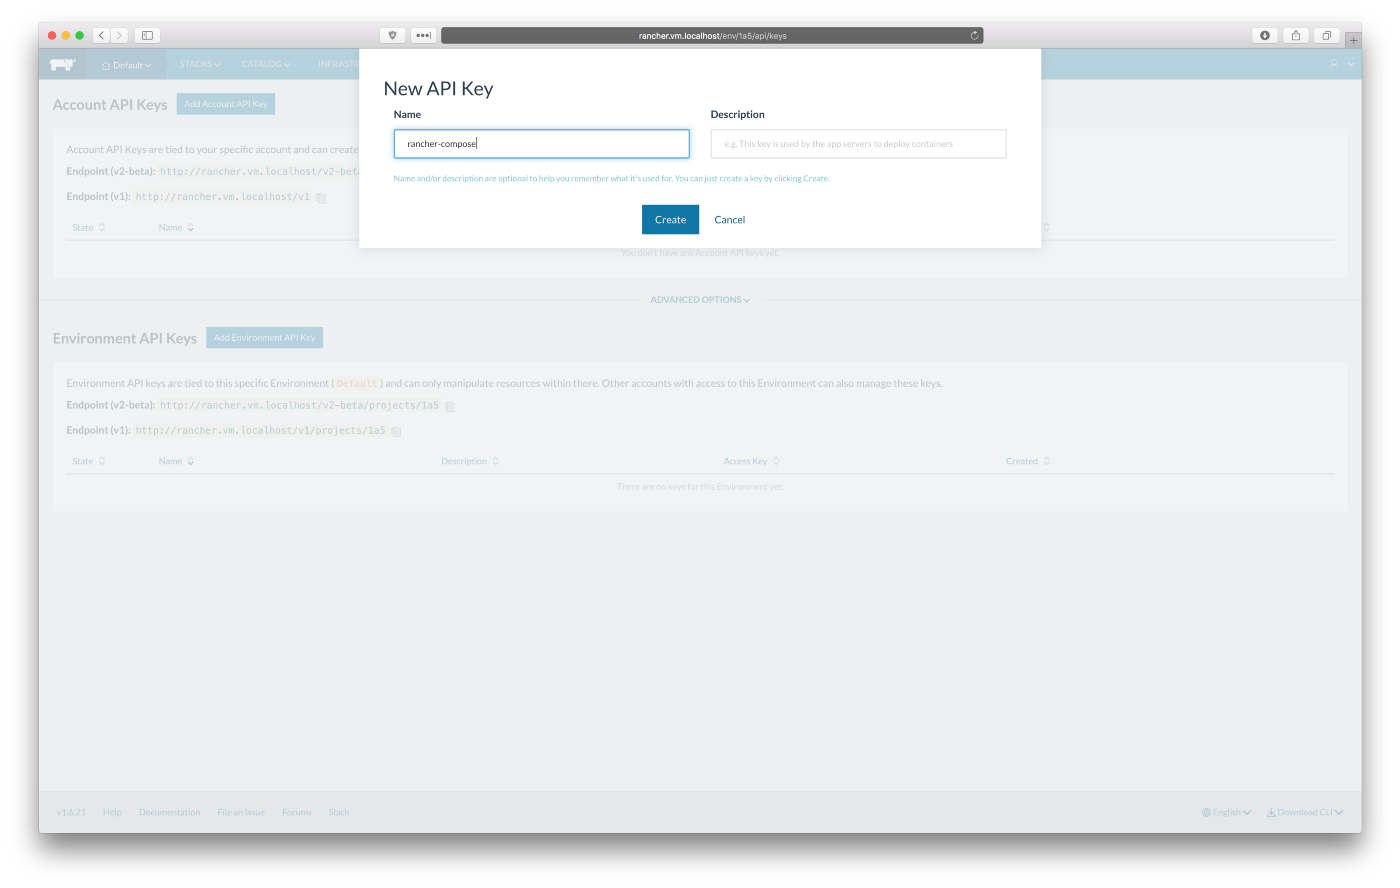
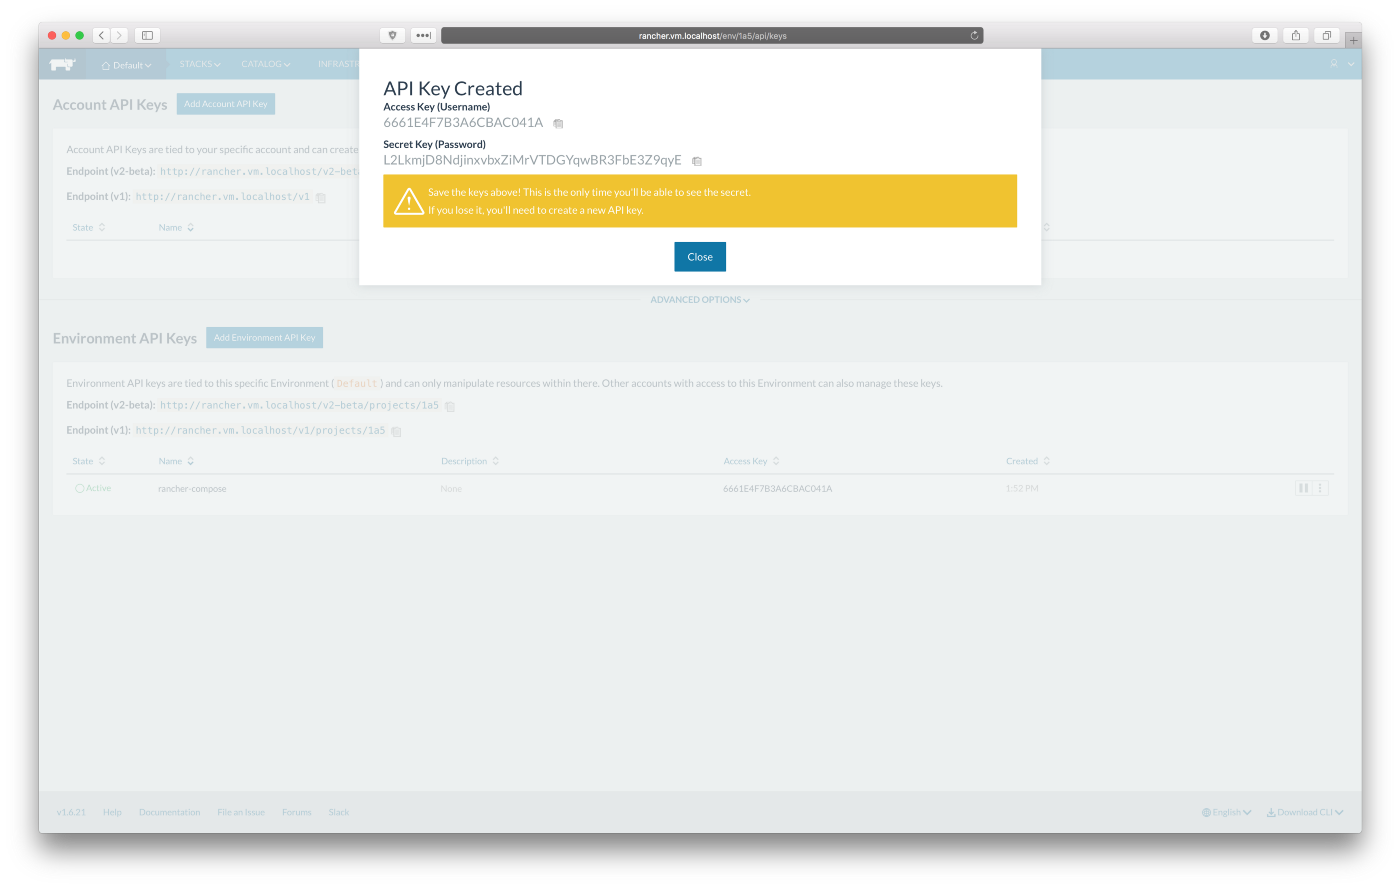
Go to http://rancher.vm.localhost/env/1a5/api/keys and follow the screenshots below to create a new environment API key:
Note: don’t forget to save your new API key and secret, you will need it in the next step.

Let’s set environment variables for Rancher Compose:
Replace <API_KEY> and <API_SECRET> with your key and secret.

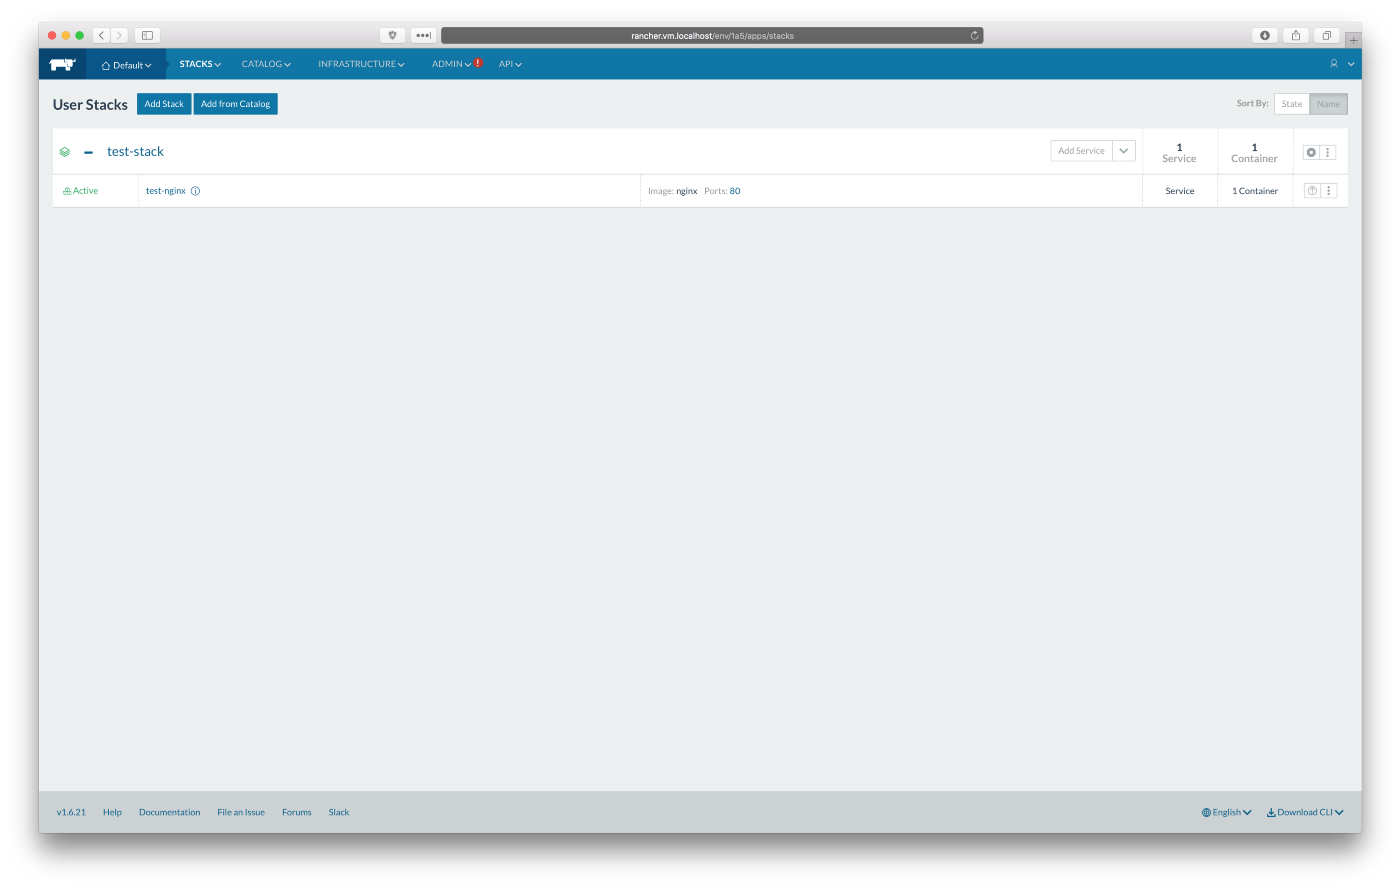
Deploy test Nginx stack to Rancher:

When you go to http://rancher.vm.localhost/env/1a5/apps/stacks, you will see your test stack:
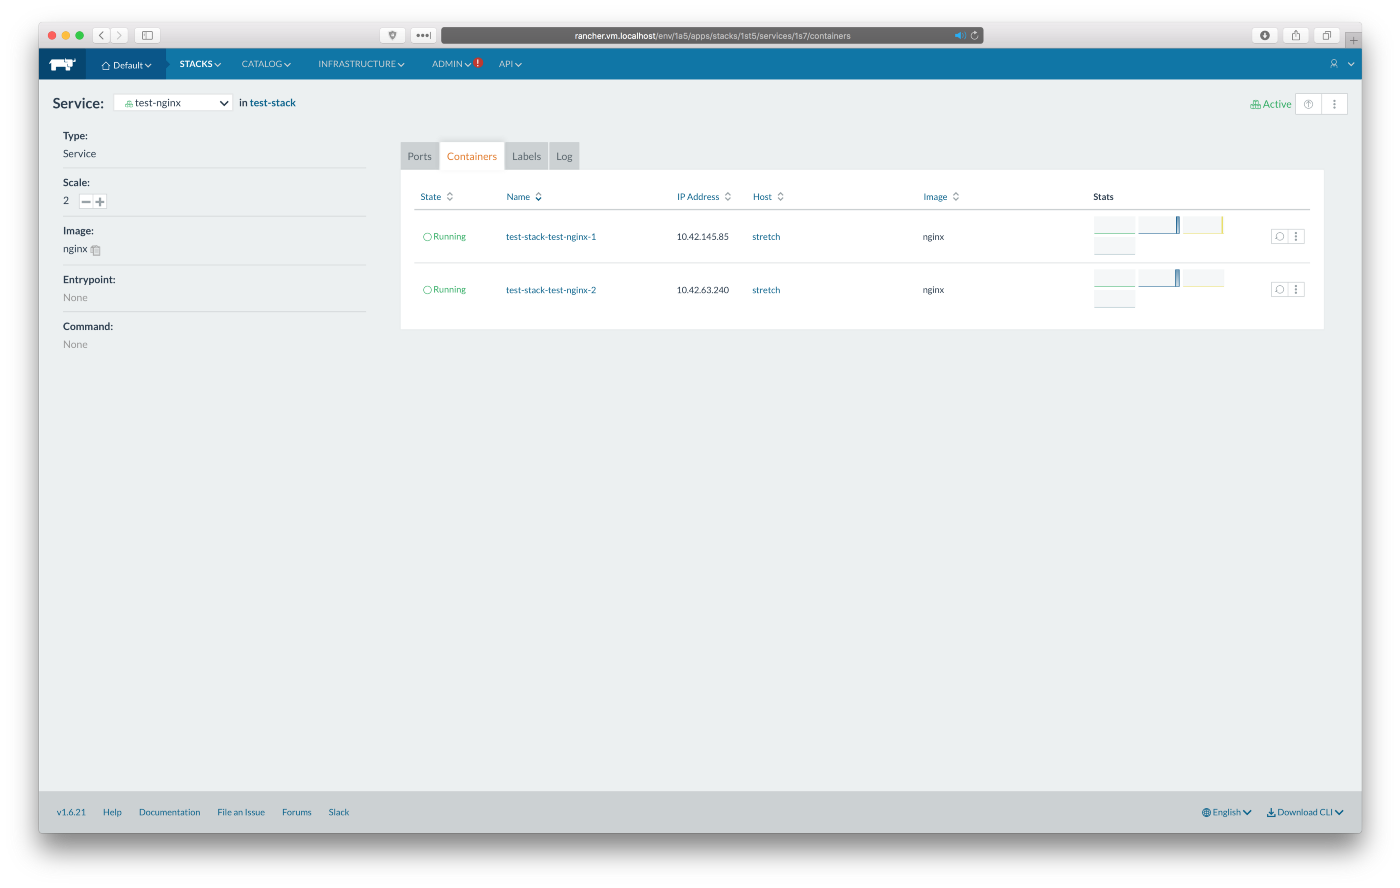
Click on the “test-nginx” service name to edit it. Let’s scale the service up by clicking the plus button on the left side of the screen. That will start another Nginx container. There will be one on each host. You will see:
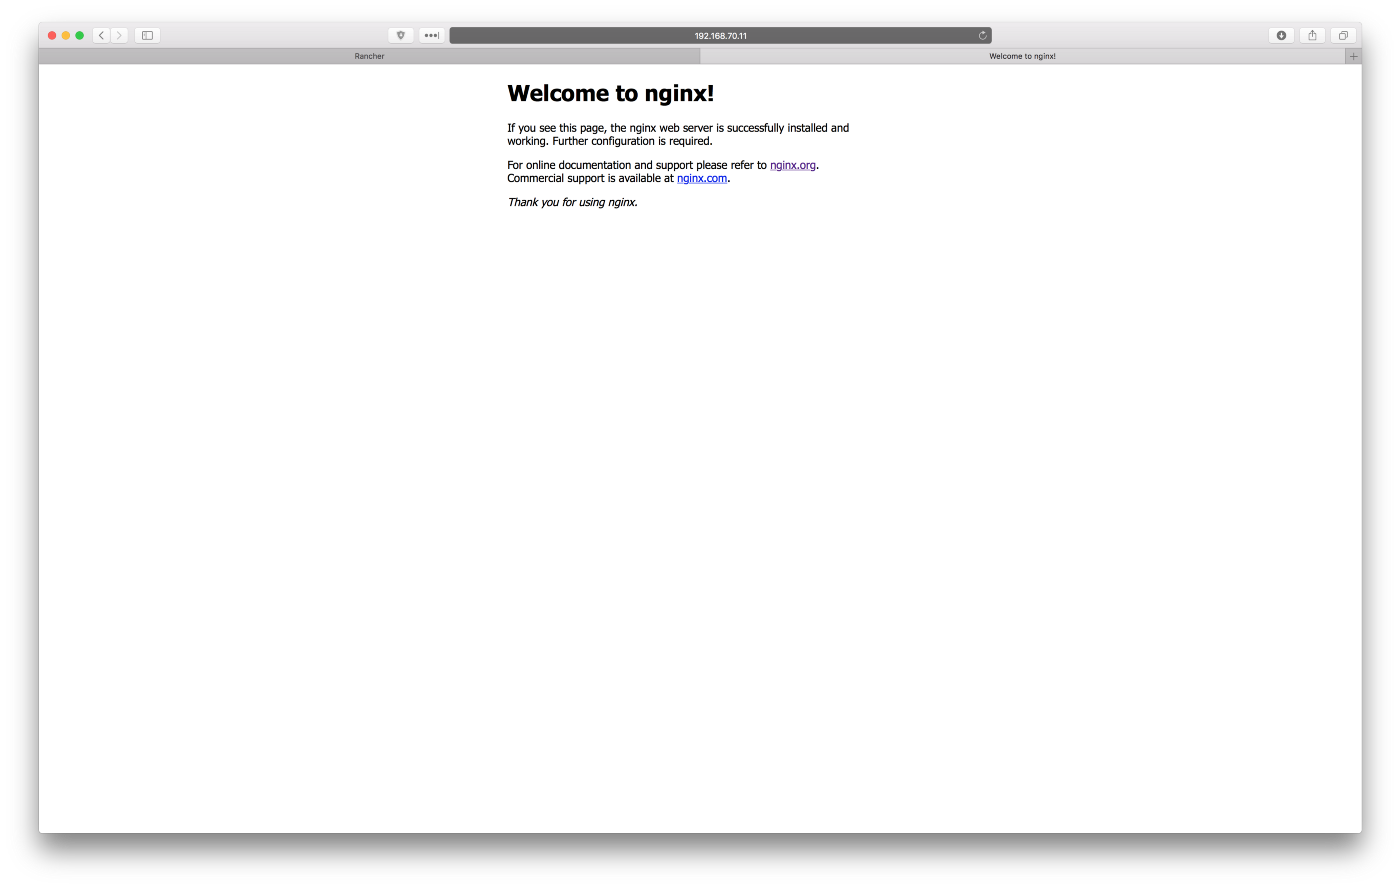
You can visit http://192.168.70.11 and http://192.168.70.12, which will give you the default Nginx welcome page, as you can see on the screenshots below:
Congratulations! You have a working playground with a Rancher server and a Rancher agent in high availability. Test as much as you like. If you break something, do ‘vagrant destroy’ and start over in a no time.